Popcorn Rock

I decided it was time to stop neglecting my science blog.  I’m hoping to post more regularly.  For now, I have a few older things I’ve done with my girls to share, and some new project ideas in the works.

When we were at a science museum once, I decided to pick up Popcorn Rock.   This is a sample of Dolomite (a sedimentary mineral made out of calcium magnesium carbonate) that grows Aragonite crystals when placed in a bowl of white vinegar.

 photo 1-P1110080.jpg

 photo 1-P1110082.jpg

It’s probably the easiest investigation ever.

 photo 1-P1110085.jpg

Even way easier that the sugar crystal growing experiment we did.

Just open up the package place it in a bowl (ours was glass), add vinegar and wait.  For us, it took a little over two weeks to start seeing our Aragonite crystals.

Nothing really happened until the vinegar evaporated.

According to wikipedia

Aragonite’s crystal lattice differs from that of calcite, resulting in a different crystal shape, an orthorhombic system with acicular crystals. Repeated twinning results in pseudo-hexagonal forms. Aragonite may be columnar or fibrous, occasionally in branching stalactitic forms

 photo 1-P1110160.jpg

And then, two days later:

 photo 1-P1110161.jpg

And two days after that:

 photo 1-P1110314.jpg

To understand what’s going on, I found this article from Educational Innovations on Crystal Growing Dolomite.

The Origin of Popcorn Rocks…

The rocks contained in this package are magnesium rich dolomite. Dolomite is an evaporative sedimentary rock made up of a variety of sediments and minerals. This dolomite is actually somewhat unique in that it possesses an amazing property that is not necessarily common to other dolomite samples. When placed in distilled white vinegar, this dolomite grows beautiful white aragonite crystals.

This characteristic was first discovered in 1981 by Mr. Richard D. Barnes, then a geology student at the University of Utah, who was working with fossil specimens of horn coral that he had collected. Typically, horn corals are preserved in limestone, a rock that is composed of calcium carbonate, which reacts with vinegar and dissolves in that weak acid so that the fossil can be removed and studied. The interesting thing about this rock is that is did not dissolve but rather produced spectacular, white, bulbous crystals, resembling popped kernels of corn. That is how these rocks came to have the commercial name, popcorn rocks . In going back to the site, Mr. Barnes determined that this rock layer was actually an ancient lagoon that had been surrounded by a coral reef millions of years ago. He attributes the unique, crystal growing property of the rock to the residual minerals deposited in the rock layers by sea grasses that were present in the lagoon at that time.

Posted in Chemistry, Geology | Leave a comment

Neuroscience for Kids

“The smell of a flower – The memory of a walk in the park – The pain of stepping on a nail. These experiences are made possible by the 3 pounds of tissue in our heads…the BRAIN!!

Neuroscience for Kids has been created for all students and teachers who would like to learn about the nervous system.

Discover the exciting world of the brain, spinal cord, neurons and the senses. Use the experiments, activities and games to help you learn about the nervous system. There are plenty of links to other web sites for you to explore.”

Posted in Science for Kids Links | Leave a comment

Solar Science

I have neglected my science blog for far too long, but I’m hoping to start getting back into a regular posting schedule, particularly since I’m interested in starting a Saturday Science Club.  We’ll see how it goes.  =)

But yesterday, my daughters and I went to the park with one of their friends and I decided to take along one of our science kits I’d been meaning to try out.  It was a solar science kit.

 photo P1230025.jpg

I decided to have the kids try out the Solar Furnace.

 photo P1230028.jpg

How does work? According to the booklet, solar furnace is a spherical parabolic mirror which reflects parallel light rays to a single point – the focal point.
 photo scan0114.jpg

I had the kids test it out for themselves.  They did feel the warmth.

 photo P1230030.jpg

I had mentioned how neat it would be to try the burn a feather activity, but that it was too bad we didn’t have a feather.

 photo scan0113.jpg

My daughter’s friend piped up, “I know where there is a feather!”  And sure enough, she came back with a great one.  So we tried to use the solar furnace to singe a feather.    For a while, I had my doubts because nothing was happening.

 photo P1230031.jpg

But after a while of holding it steady, we were able to focus the light long enough and it started to smoke and singe the feather.  It was so neat!

 photo P1230033.jpg

Posted in Solar Furnace, Solar Science | Leave a comment

The Invincible Soap Bubble

My 5th grade daughter had to do a science fair project this year and after much deliberation, decided on this project called The Invincible Soap Bubble, found at All Science Fair Projects dot com.

I just thought it was one of the most visually interesting projects I’ve seen, so I thought I’d share it here:

Materials
• 5 plastic cups
• 100 mL liquid detergent
• 500 mL water, plus extra to add to lid
• 10 mL corn syrup
• 10 mL glycerin
• 10 mL lemon juice
• 10 mg sugar
• stopwatch
• air pump
• straw
• marker pen
• measuring beaker
• medicine cup
• round plastic lid

 photo P1200678_zps6e3a343a.jpg

Procedure:

1.  Using the marker pen, label the 5 plastic cups as “corn syrup”, “glycerin”, “sugar” , “lemon” and detergent only.

2.    Each cup is filled with 100ml of tap water. Another 20ml of liquid detergent is added to each cup and mixed with the water. Then 10 ml of corn syrup, glycerin, sugar or lemon is added to each cup and mixed once more.

 photo DSC_0010_zpsedf6e178.jpg

 photo DSC_0039_zps39afe2db.jpg

The cup marked detergent only is the control and it contains only a mixture of water and detergent.

3.    The lid is wetted with the extra water.  Then the straw is attached to the air pump and dipped into the solution briefly.  The pump will be pushed in and out and the bubble is blown to fill the lid.

 photo DSC_0052_zps85c159bc.jpg

The stopwatch is started as soon as the straw is removed and it is stopped when the bubble pops.  Record how long the bubble lasts before it bursts.   Repeat this process for a total of 10 times.

 photo P1200687_zps4afb2bfe.jpg

4.    Step 4 is repeated using the solutions in the other 4 cups and the times are compared to find the solution with the longest times.

When the science project is done, calculate the average times for each additive and make a bar chart.  Determine which bubble additive made the bubbles last the longest and the shortest.

Quick answer:  We found the additive which made the bubbles last the longest was glycerin.

Once the science project is complete, have fun playing with your new bubble solution:

 photo DSC_0047-001_zpsb97d551b.jpg

Why do bubbles have color?

From the website bubbles.org, we see that:

A bubble reflects color from its surroundings.

When a light wave hits the surface of a bubble, part of the light is reflected back to a viewer’s eye from the outer surface and part of the light is reflected from the inner surface which is a few millionths of an inch further. As the two waves of light travel back, they interfere with one another causing what we know as color. When the waves reinforce each other, the color is more intense. When the wave get close to canceling each other out, there is almost no color. As a bubble wall gets thinner, either from a weak solution or because gravity has pulled its chemical content to the bottom, the distance between the inner surface and the outer surface of the bubble becomes less and less until the two reflected waves of light start to coincide and cancel each other out. The result is that the bubble loses its color and can become nearly invisible.

 photo P1200694_zps3a21b15b.jpg

At what angle do bubbles join?

At Exploratorium.com we find that

Regardless of their relative sizes, the bubbles will meet the common wall at an angle of 120 degrees. This is easy to see in the bubble picture to the right. All three bubbles meet at the center at an angle of 120 degrees. Although the mathematics to prove this are beyond the scope of this article, the 120 degree rule always holds, even with complex bubble collections like a foam.

 photo P1200679_zps6f9181c7.jpg

Would you like to get your geek on and know the mathematical proof that 120 degrees is the correct answer?

Here you go:

Click to access JoGA17-75.pdf

 photo P1200692_zpscaae15b3.jpg

And if this isn’t enough geeky bubble fun for you, you can take a look at Project Gutenberg’s eBook of C.V. Boys  SOAP-BUBBLES AND THE FORCES WHICH MOULD THEM.   He delivered this bubble physics lecture over three days in the theater of the London Institution on December 30, 1889, January 1, 1890 and January 3, 1890 before a live juvenile audience.

I love his dedication:

This book is dedicated

BY THE AUTHOR

AS A TOKEN OF ESTEEM AND GRATITUDE,

AND IN THE HOPE THAT

IT MAY EXCITE IN A FEW YOUNG PEOPLE SOME SMALL

FRACTION OF THE INTEREST AND ENTHUSIASM WHICH

HIS ADVENT AND HIS LECTURES AWAKENED

IN THE AUTHOR, UPON WHOM THE LIGHT

OF SCIENCE THEN SHONE FOR

THE FIRST TIME.

So, when is the last time your kids went to a physics lecture for inspiration?

At the very least, I encourage you to take a look at that eBook and see the interesting and detailed hand illustrations.

I think the next project we might try is experimenting with different shaped wire frames for experimenting with soap films (some designs of which were illustrated in C.V. Boys book).

Posted in Uncategorized | Leave a comment

Sandhill Crane Migration

We witnessed a sandhill crane migration this morning.  These birds flew rather crazy, kind of in a circular pattern and I don’t know why.  It  seems a very inefficient way of getting from point A to point B.  They made a loud cooing call, which was crazy too.

Photobucket

Photobucket

I found a youtube video clip of the sandhill cranes

And this migration study being done at Ohio’s Department of Natural Resources.  I think it’s pretty neat stuff.

The last image is from March 8, 2012, just one week ago.

Photobucket

There’s even a Crane Watch Festival in Kearney, Nebraska the week of March 23-April 1, 2012.

You can check out Rowe Sanctuary Crane Cam for live footage.

Posted in Bird Watching, Migration | Leave a comment

Tapping Maple Trees for Syrup

Long before you could go to your local grocery store and pick up a bottle of artificial maple flavored syrup made from corn syrup, sugar and a bunch of artificial stuff, people would collect the sap from maple trees.

From Wikipedia, where you can learn about the history of maple syrup:

Maple syrup is a syrup usually made from the xylem sap for sugar maple, red maple, or black maple trees, although it can also be made from other maple species. In cold climates, these trees store starch in their trunks and roots before the winter; the starch is then converted to sugar that rises in the sap in the spring. Maple trees can be tapped by boring holes into their trunks and collecting the exuded sap. The sap is processed by heating to evaporate much of the water, leaving the concentrated syrup.

I’ve known about a local country park which has maple tapping events open to the public every March, but for the past few years, always seemed to miss it.  I finally remembered ahead of time and so I took our daughters to see what it was all about.

Our day started out with a 20 minute lecture of the process of tapping maple trees.

We were told that the best time to tap a tree was when the nights were below 32 degrees and the days were above 32 degrees.

Photobucket

We were told that after selecting a tree of an appropriate diameter, they would drill into the trunk just deep enough to reach the xylem layer.  At this point, the sap contains mostly water and about 3% sugar.

Photobucket

They would then put a metal spile in the hole, though in the old days spiles were made from wood.  And then the sap would start dripping into buckets.

Photobucket

They covered the buckets with lids to keep out rainwater and deter the deer, but sometimes bugs or leaves would get into the sap.  That didn’t matter so much as the sap would get filtered and cooked down before becoming edible maple syrup.

Photobucket

Traditional collection methods include a few buckets and spiles arranged in a stair-step pattern.  It was advised to not make the taps in a straight line around the trees, this is known as girdling and can harm the tree.

Newer methods of sap collection involved multiple spiles tapped into multiple trees and connected with a hose to collect the sap.

Photobucket

This would all culminate in one large barrel.

Of course, while this makes for efficient collection, in the back of my mind, I wonder if the plastics used are free of nasty chemicals.

Photobucket

The maple sap would be taken to the “Sugar Shack” for further processing.

Photobucket

We noted the warning sign with a smile before we proceeded inside.

Photobucket

It takes about 40 gallons of tree sap to make one gallon of maple syrup, which explains why it’s so expensive.  About 66 percent of the water needs to be removed to make maple syrup.

Photobucket

There were a group of historical re-enacters  who dressed as 1700s Voyageurs that were making maple sugar over an open fire.

Photobucket

All of the water needs to evaporate in order to make maple sugar.

Photobucket

It was delicious.

Photobucket

It was a very beautiful day, and very educational too.  We went home with a couple bottles of maple syrup that they made.

For more information, check out these links:

http://biology.clc.uc.edu/fankhauser/Buds_and_Bark/tapping_sugar_maple_index.html

http://www.umext.maine.edu/onlinepubs/pdfpubs/7036.pdf

Posted in Botany | 2 Comments

Teaching Forensic DNA analysis to 4th graders again

It’s been so long since I worked in forensic DNA, but I do keep up to date.  Occasionally I get to give lectures to schools.  I gave one lecture to a class of first year biology students at a university before, but I still prefer giving lectures to elementary school kids like I did a few years ago.  It’s so much more fun.

The forensic DNA talk I gave turned out well, and despite low lighting, overhead projector difficulties from time to time and a bad hair day.

I have some fuzzy photos from the forensics talk.  I asked my husband to be my papperazzi.  Because I knew it would make a great blog post.

This is a great DNA model (CSI DNA build kit from Planet Toys) I purchased and put together with my fourth grade daughter for her class.

Photobucket

Forensic evidence bag o’tricks.

Photobucket

Pretend evidence – I had a few types of mock evidence:  a blood tube, bloodstains on a mini-blanket, swabs and, hair and fiber evidence.  I’ll take pictures of them later and post them.

Photobucket

I’m sure I’m saying something really cool in this photo.

Photobucket

The talk went really well, I had a good time and I used great comedic timing whenever possible, ESPECIALLY when I made a mistake or I had a technical difficulty.  Works as a nice distraction and gives me breathing room.

I explained to them how DNA is tested in the forensic lab and how I help put criminals in jail and how I help other people who were wrongly convicted get out of jail with my tests.

One of the girls raised her hand and I thought it was a question.  Instead she said, “so, you’re like a hero ?!”  (I thought that was so nice).

Well, yeah, I guess I was.

The kids asked great questions and enjoyed the interactive approach – I passed around my visual aids so the kids got to see them close-up.

After my lecture, I asked them if they thought they wanted to be forensic scientists when they grew up.  I was tickled when about 8 of them (a lot of them girls) raised their hands enthusiastically.

I was really glad to hear a lot of the kids enjoyed the talk, and when I asked my daughter if I embarrassed her at all (which was a worry she had two days ago), she said “no” and she thought it was cool.

The teacher thought I did such a good job, we got to take the class rat home.
Photobucket

Actually the rat had nothing to do with the lecture.  We are rat sitting over the long winter break weekend.  They are doing an experiment with two rats at school.

Posted in Biology, Forensic Science | Leave a comment

Electric – Tesla Coils

I think the one of best parts of the Wisconsin Dells trip we went on a few years back was the Tommy Bartlett’s Exploratory, an interactive science museum.

We saw a real working Tesla Coil

is a type of  resonant transformer circuit invented by Nikola Tesla around 1891.It is used to produce high voltage, relatively high current, high frequency alternating current electricity. Tesla experimented with a number of different configurations and they consist of two, or sometimes three, coupled resonant electric circuits.  Tesla used these coils to conduct innovative experiments in electrical lighting, phosphorsence, x-ray generation, high frequency alternating current phenomena, electrotherapy, and the transmission of electrical energy without wires.

Photobucket

Photobucket

You can check out someone’s musical Tesla Coils playing the Sugar Plum Fairy on Youtube.

I read Margaret Cheney’s biography Tesla: Man Out of Time not too long ago.  From her book, I read something interesting.

The following is a description of Tesla doing the scientific equivalent of a magic tricks for his guests – English journalist Chauncey McGovern, American humorist Mark Twain, and actor Joseph Jefferson, one midnight in his Manhattan loft/laboratory, as recalled by McGovern:

Fancy yourself seated in a large, well-lighted room, with mountains of curious looking machinery on all sides. A tall, thin young man walks up to you, and by merely snapping his fingers creates instantaneously a ball of leaping red flame, and holds it calmly in his hands. As you gaze you are surprised to see it does not burn his fingers. He lets it fall upon his clothing, on his hair, into your lap, and, finally, puts the ball of flame into a wooden box. You are amazed to see that nowhere does the flame leave the slightest trace, and you rub your eyes to make sure you are not asleep.

One of Mark Twain’s quotes is said to have come about due to his knowledge of Tesla’s work:

…Thunder is good, thunder is impressive, but it is lightning that does the work.

Posted in Electricity, Tesla Coils | 4 Comments

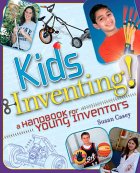
Kids Inventing! An Interview with author Susan Casey

Susan Casey is the author of Kids Inventing! A Handbook for Young Inventors and Women Invent! Two Centuries of Discoveries That Have Shaped Our World. She is also a journalist and her articles and photographs have appeared in Family Circle, Americana, USAir, Women’s Sports, Soap Opera Digest, the Los Angeles Times, the San Francisco Chronicle and Examiner, Inventors Digest, Electrical Contractor and many other publications. When she was a girl, she loved reading and writing and through the efforts of a teacher, her first magazine article was published when she was in the seventh grade. After graduating with a degree in history from Santa Clara University, she spent a summer doing volunteer work in a small village in rural Mexico. It was a trip to Africa that prompted her writing career.

Today I am interviewing Ms. Casey about her book Kids Inventing! A Handbook for Young Inventors on my other blog, Raising Smart Girls.  Please head on over and show her some blog love and comment.  I would like to host a book giveaway on that blog soon, and I would appreciate it if you left a small comment indicating your interest.

Posted in Interview, Inventing | Leave a comment

Local Planetarium

We attended a birthday party at a local planetarium that hosts both private and public shows, housed within a middle school. It was a very fun and educational birthday party.

Since it was in the middle of the day, we didn’t use their telescopes on their observation decks, but we explored the weather station, used  interactive NASA internet displays and watched images linked to  NASA television.

Photobucket

Photobucket

Photobucket

We saw a simulated sky show using their domed ceiling and projector.

Photobucket

We brought home a few cool educational toys.

Photobucket

And played with them.

Photobucket

Photobucket

I was very surprised at how inexpensive it was to rent the planetarium out for a birthday party and I’m planning on reserving it for Little E’s birthday party in a few months.

Posted in Astronomy | Leave a comment